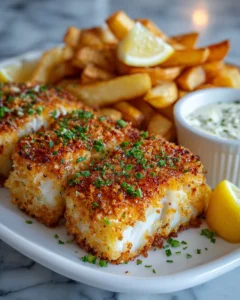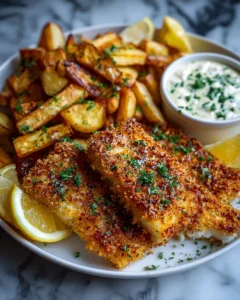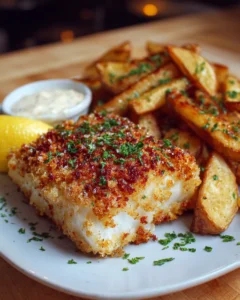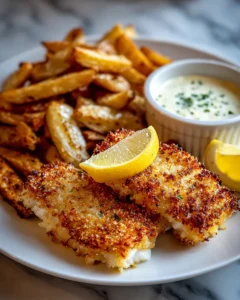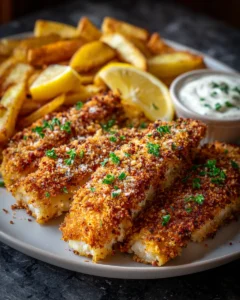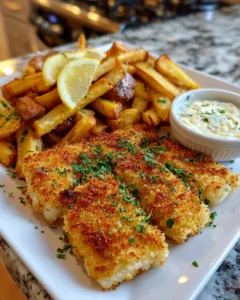
Few dishes evoke comfort and nostalgia quite like fish and chips. Whether it’s a rainy afternoon, a cozy family dinner, or a weekend treat, this classic British dish is beloved for its crunchy exterior, flaky fish, and golden, crisp fries. While traditional fish and chips are deep-fried, this baked version offers all the same flavor and crunch without the excess oil, making it a healthier alternative without compromising taste.
Inspired by childhood memories of seaside visits and the unmistakable aroma of fresh fish and chips wrapped in newspaper, this recipe brings the iconic British favorite into your own kitchen. Perfect for family gatherings, casual dinners, or even a small weekend celebration, these crispy baked fish and chips promise a golden, satisfying meal that will have everyone reaching for seconds.
Why You’ll Love This Recipe
-
Healthier Alternative: Baking instead of frying reduces fat while keeping the fish and potatoes crunchy and flavorful.
-
Simple Ingredients: You don’t need fancy ingredients—just fresh fish, potatoes, and a few pantry staples.
-
Quick and Easy: With minimal prep and baking, you can have dinner ready in under an hour.
-
Family-Friendly: Loved by kids and adults alike, it’s a meal that satisfies all taste preferences.
-
Customizable: From seasoning the fish to choosing your favorite dipping sauces, this recipe can be tailored to your taste.
Ingredients
For the Fish
-
4 white fish fillets (cod, haddock, or pollock work best)
-
1 cup all-purpose flour
-
2 large eggs
-
1 cup panko breadcrumbs
-
1 teaspoon paprika
-
1 teaspoon garlic powder
-
1 teaspoon salt
-
½ teaspoon black pepper
-
Cooking spray or a little olive oil
For the Chips
-
4 large russet potatoes
-
2 tablespoons olive oil
-
1 teaspoon smoked paprika
-
½ teaspoon garlic powder
-
Salt and pepper to taste
Optional Dips
-
Tartar sauce
-
Ketchup
-
Malt vinegar
Step-by-Step Instructions
Creating perfectly crispy baked fish and chips is all about preparation, timing, and a few simple techniques. Follow these steps carefully to ensure a golden, crunchy, and flavorful result that rivals traditional fried versions.
Preparing the Potatoes
-
Preheat the oven
Begin by preheating your oven to 425°F (220°C). A hot oven is essential for achieving crisp, golden chips. If the oven isn’t fully heated, the potatoes may release moisture and become soggy rather than crunchy. Line a large baking sheet with parchment paper to prevent sticking and make cleanup easy. -
Peel and cut the potatoes
Peeling is optional, but it gives a cleaner texture. Cut the potatoes into evenly sized matchsticks or wedges. Uniform pieces ensure that all chips cook at the same rate, avoiding some being undercooked while others burn. Try to aim for pieces about ¼ to ½ inch thick for the perfect balance between soft inside and crisp outside. -
Soak the potatoes
Place the cut potatoes in a large bowl of cold water and let them soak for 20–30 minutes. Soaking removes excess starch, which is a key factor in preventing sogginess and achieving that coveted crisp texture. You can also soak them longer in the fridge for up to a few hours if preparing ahead of time. - Season the potatoes
After soaking, drain the potatoes and pat them thoroughly dry with a clean kitchen towel or paper towels. Excess moisture can prevent crisping. Toss the potatoes with olive oil, smoked paprika, garlic powder, salt, and black pepper. The olive oil helps the seasonings stick and promotes browning, while smoked paprika adds a subtle depth of flavor reminiscent of traditional fish and chips. -
Bake the chips
Spread the seasoned potatoes in a single layer on the prepared baking sheet. Avoid overcrowding to ensure even cooking. Bake for 25–30 minutes, flipping halfway through the cooking time to brown both sides evenly. Keep an eye on them toward the end of baking, as ovens vary and you want them perfectly golden and crisp.
Preparing the Fish
-
Set up the breading station
While the potatoes bake, prepare the breading for the fish. Use three shallow dishes: one for flour, one for beaten eggs, and one for a mixture of panko breadcrumbs, paprika, garlic powder, salt, and pepper. Arranging the ingredients this way allows you to coat the fish efficiently and ensures each fillet has an even, crispy crust. -
Coat the fish
Take each fillet and dredge it first in flour, shaking off any excess. Next, dip it into the beaten eggs, letting the extra drip off, and finally coat it thoroughly with the seasoned panko mixture. Press lightly to ensure the breadcrumbs adhere to the fish. The panko crumbs create a light, crunchy texture, while the seasoning infuses the fillets with flavor. -
Bake the fish
Place the coated fillets on a separate baking sheet lined with parchment paper. Lightly spray or drizzle a small amount of olive oil over the fish to promote browning and crispiness. Bake for 15–20 minutes, depending on the thickness of the fillets, until the fish turns golden and flakes easily with a fork. Avoid overbaking, as fish can dry out quickly.
Following these steps carefully ensures that your baked fish and chips come out perfectly every time: crunchy on the outside, tender and flaky on the inside, and bursting with flavor.
Tips for Perfect Crispy Baked Fish
-
Use panko breadcrumbs: They create a lighter, crunchier crust compared to regular breadcrumbs.
-
Don’t overcrowd the pan: Give each fillet and chip enough space to cook evenly.
-
Flip halfway through baking: This ensures even crisping for both the fish and the fries.
-
Check for doneness: Fish is done when it flakes easily with a fork and the internal temperature reaches 145°F (63°C).
Serving Suggestions
Crispy baked fish and chips are delicious on their own, but pairing them with the right sides and sauces elevates the meal:
-
Tartar Sauce: Classic and tangy, perfect for dipping the fish.
-
Lemon Wedges: A squeeze of fresh lemon brightens the flavors.
-
Coleslaw: Adds crunch and a refreshing contrast to the warm fish and chips.
-
Peas or Mushy Peas: A traditional British accompaniment.
-
Ketchup or Malt Vinegar: Essential for a true “fish and chips” experience.
Variations You Can Try
-
Spicy Fish: Add cayenne pepper or chili powder to the breadcrumb mixture for a spicy kick.
-
Herb-Crusted Fish: Mix fresh parsley, dill, or thyme into the breadcrumbs for added flavor.
-
Sweet Potato Chips: Swap russet potatoes with sweet potatoes for a healthier, slightly sweeter alternative.
-
Gluten-Free Option: Use almond flour or gluten-free panko breadcrumbs in place of regular breadcrumbs.
Nutritional Information
Per serving (approximate for 1 fillet and a portion of chips):
-
Calories: 450 kcal
-
Protein: 28 g
-
Carbohydrates: 45 g
-
Fat: 15 g
-
Fiber: 5 g
This baked version is lower in fat than traditional fried fish and chips while still providing a hearty, satisfying meal.
Why Baked Fish and Chips Are Perfect for Any Occasion
Baked fish and chips offer versatility that makes them perfect for many settings:
-
Weeknight Dinners: Quick to prepare and satisfying for the whole family.
-
Casual Entertaining: Impress guests with a homemade version of a classic takeaway dish.
-
Comfort Food Moments: Rainy days, cozy nights in, or simply when you crave something crunchy and warm.
-
Kid-Friendly Meals: Crispy, flavorful, and easy to enjoy with hands or forks.
Tips for Making the Meal Even More Memorable
-
Presentation Matters: Serve on a large platter with lemon wedges and a sprinkle of fresh herbs.
-
Pair with a Drink: A crisp white wine or a cold sparkling lemonade complements the flavors perfectly.
-
Customize the Seasoning: Tailor the spices to your preference, from smoky paprika to fresh herbs or even a hint of curry powder.
-
Make it Fun: Let kids help coat the fish or toss the chips with seasoning for a hands-on cooking experience.
Frequently Asked Questions
1. Can I use frozen fish fillets?
Yes, you can definitely use frozen fish fillets for this recipe. The key is to ensure they are fully thawed before breading. Thaw them slowly in the refrigerator overnight or place them in a sealed bag under cold running water for quicker results. Once thawed, pat the fillets dry with paper towels. Excess moisture can prevent the breadcrumbs from sticking properly, which may result in a less crispy coating. Using fresh or properly thawed fish ensures a perfectly crunchy crust and tender, flaky interior.
2. Can I prepare the chips ahead of time?
Absolutely! Preparing the potatoes in advance can save time, especially for busy weeknights. After cutting the potatoes into matchsticks or wedges, soak them in cold water for 20–30 minutes to remove excess starch. You can then drain, pat dry, and store the potatoes in the refrigerator for several hours or even overnight. When you’re ready to bake, toss them with olive oil and seasonings and bake fresh. This method keeps the fries crisp and flavorful while giving you a head start on dinner prep.
3. How can I make the fish extra crispy?
For the crispiest baked fish, a few simple techniques make all the difference. First, make sure your fillets are thoroughly coated with the breadcrumb mixture. Press the breadcrumbs gently onto the fish so they adhere well. Next, lightly spray or drizzle a small amount of olive oil or cooking oil over the top of the breaded fillets before baking. This helps the crust brown evenly and develop a satisfying crunch. Finally, avoid overcrowding the baking sheet so the hot air can circulate around each fillet. Flipping halfway through baking is optional but can enhance even browning.
4. Can I use other types of fish?
Yes! This recipe is versatile and works with a variety of white fish. Cod, haddock, pollock, and tilapia are excellent choices. Adjust the baking time based on the thickness of the fillets; thicker fillets may need a few extra minutes, while thinner fillets bake faster. Using different types of fish allows you to experiment with flavors and textures while keeping the dish healthy and delicious.
5. What’s the best way to store leftovers?
If you have leftover fish and chips, store them in an airtight container in the refrigerator for up to two days. To reheat, place the fish and fries in a preheated oven at 375°F (190°C) for 10–15 minutes to restore their crispiness. Avoid microwaving, as this can make the coating soggy and the fries limp. Proper reheating ensures that even leftovers taste almost as good as freshly baked.


