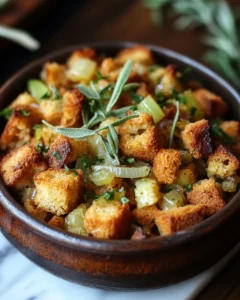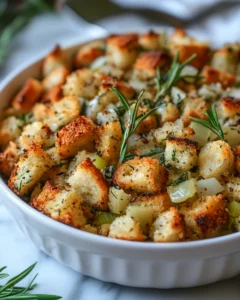
When the cooler months roll in and kitchens begin to fill with the warm, savory aromas of comfort food, few dishes bring as much nostalgia as a classic sage and onion stuffing. This beloved side dish has stood the test of time, gracing dinner tables across America during special gatherings and cozy family meals alike. Its humble ingredients—simple bread, sautéed onions, aromatic sage, and butter—combine to create a flavorful, comforting stuffing that perfectly complements roasted poultry or hearty vegetable mains.
This recipe takes inspiration from the old-fashioned homemade stuffing that has been passed down through generations. There’s something magical about the way its rustic flavors blend—earthy sage, sweet onion, and soft, buttery bread baked to golden perfection. Whether it’s part of a festive spread or a simple Sunday dinner, this Classic Sage and Onion Stuffing delivers timeless flavor that feels like home.
The Secret to the Best Classic Stuffing
What makes this stuffing so special is its perfect balance of moisture and texture. The bread cubes should be slightly dry to absorb the flavors of the butter, onion, and herbs. The sage, often called the “soul” of stuffing, provides that comforting, woodsy flavor that makes the dish so memorable. Using real butter and slowly cooking the onions until tender ensures a rich, savory depth that’s impossible to replicate with shortcuts.
The beauty of this recipe is its versatility—you can bake it inside a casserole dish for a golden, crisp top or use it as a traditional stuffing alongside roasted chicken or turkey. You can even adapt it for vegetarian meals by serving it as a flavorful side with roasted vegetables or a lentil loaf.
Ingredients
-
10 cups day-old bread cubes (white or whole wheat)
-
1 cup unsalted butter
-
2 ½ cups yellow onions, finely chopped
-
1 ½ cups celery, chopped
-
3 tablespoons fresh sage, finely chopped (or 2 teaspoons dried)
-
2 tablespoons fresh parsley, chopped
-
1 teaspoon dried thyme
-
1 teaspoon salt (or to taste)
-
½ teaspoon black pepper
-
2 ½ to 3 cups vegetable or chicken broth (low sodium)
-
2 large eggs, lightly beaten (optional for extra binding)
Directions
-
Prepare the bread:
Cut the bread into cubes and spread them out on a baking sheet. Let them sit overnight to dry out, or place in a 300°F (150°C) oven for 10–15 minutes until lightly crisp. This step ensures your stuffing won’t turn mushy. -
Cook the vegetables:
In a large skillet, melt the butter over medium heat. Add the chopped onions and celery, cooking slowly until the onions are soft and translucent, about 10 minutes. Stir occasionally to prevent browning. -
Add the herbs:
Stir in the sage, thyme, parsley, salt, and pepper. Cook for another 2 minutes to let the herbs bloom and release their aroma. -
Combine the ingredients:
Place the dried bread cubes in a large mixing bowl. Pour the buttery onion and herb mixture over the bread and toss gently until evenly coated. -
Moisten the stuffing:
Gradually pour in the broth, 1 cup at a time, tossing lightly until the bread is moist but not soggy. You may not need all of the broth depending on the type of bread used. If using eggs, mix them in at this stage for extra richness. -
Bake the stuffing:
Preheat the oven to 350°F (175°C). Lightly grease a 9×13-inch baking dish, then spoon the stuffing into the dish. Cover with foil and bake for 30 minutes. Remove the foil and bake for another 15–20 minutes, until the top is golden brown and slightly crisp. -
Serve warm:
Serve immediately as a side dish to roasted chicken, turkey, or your favorite vegetarian main course.
Prep Time: 20 minutes
Cook Time: 50 minutes
Total Time: 1 hour 10 minutes
Yield: Serves 8
Tips for Perfect Sage and Onion Stuffing
-
Dry Bread Is Key: Fresh bread can lead to soggy stuffing. Drying the cubes in advance helps them soak up flavor while maintaining texture.
-
Adjust Moisture Levels: Add broth gradually. The ideal texture is soft but not wet.
-
Use Fresh Sage for Best Flavor: Dried sage works well, but fresh sage provides a more vibrant, earthy taste.
-
Add Texture: For extra crunch, consider tossing in a handful of toasted breadcrumbs or nuts just before baking.
-
Make Ahead: You can prepare the mixture up to a day in advance. Keep it covered in the refrigerator, then bake just before serving.
Variations to Try
The beauty of this stuffing recipe is that it serves as a flavorful base for endless variations. Here are a few ways to make it your own:
-
Mushroom Sage Stuffing: Add 1 ½ cups sautéed mushrooms to give the dish a meaty, umami depth.
-
Apple and Herb Stuffing: Add diced apples for a subtle sweetness that pairs beautifully with the sage.
-
Cornbread Stuffing: Substitute half of the bread with cornbread cubes for a Southern-style twist.
-
Cranberry Sage Stuffing: Add ½ cup dried cranberries for a pop of color and tartness.
-
Vegetable-Packed Stuffing: Mix in chopped carrots, spinach, or zucchini for a nutritious variation.
Each of these options maintains the comforting flavor profile of the original recipe while adding a personal touch that can reflect the season or occasion.
Why This Stuffing Works for Every Gathering
Sage and onion stuffing isn’t just a side dish—it’s a nostalgic centerpiece that brings comfort and warmth to the table. The flavors blend beautifully with classic main courses like roasted poultry, but it also pairs surprisingly well with vegetarian and vegan entrees. It’s a recipe that unites different generations and diets with one simple truth: everyone loves that golden, buttery, herby bite of perfectly baked stuffing.
Its simplicity makes it approachable for new cooks, while its traditional roots appeal to seasoned home chefs who value flavor and authenticity. You don’t need complex ingredients or advanced techniques—just a skillet, a baking dish, and a bit of love for classic home cooking.
Common Mistakes to Avoid
-
Using fresh bread: Skip the soft loaf and opt for slightly stale or oven-dried bread cubes.
-
Over-soaking: Too much broth can make the stuffing mushy. Add liquid gradually.
-
Forgetting to taste: Always taste the mixture before baking—adjust seasoning to ensure it’s well-balanced.
-
Rushing the vegetables: Let the onions and celery cook slowly for a sweet, mellow base flavor.
-
Skipping the herbs: Sage and thyme define the essence of this recipe; don’t omit or replace them completely.
Serving Suggestions
This classic stuffing pairs wonderfully with:
-
Roasted or baked chicken
-
Turkey breast or whole roasted turkey
-
Grilled or baked salmon
-
Roasted root vegetables such as carrots, parsnips, and potatoes
-
A rich vegetable gravy or mushroom sauce
For a complete meal, serve with green beans, mashed potatoes, and a crisp garden salad. The savory sage and onion flavors balance perfectly with lighter, fresher sides.
How to Turn This Recipe into a Meal
While traditionally served as a side, this stuffing can easily become the main event with a few creative tweaks:
-
Stuffed Bell Peppers: Fill halved bell peppers with the prepared stuffing and bake until tender.
-
Stuffed Squash or Pumpkin: Scoop out small pumpkins or acorn squash, fill them with stuffing, and bake for a cozy vegetarian dinner.
-
Stuffing-Stuffed Chicken Breasts: Butterfly chicken breasts, fill with a scoop of stuffing, and bake until juicy and golden.
These variations transform the classic recipe into hearty, satisfying meals that work beautifully for any occasion.
The Role of Sage and Onion in Culinary Tradition
Sage and onion have long been a cornerstone of savory cooking, particularly in English and American cuisine. Sage’s earthy, slightly peppery aroma complements the sweetness of slowly cooked onions, creating a base that enhances roasts, gravies, and stuffings alike.
In the days before pre-packaged mixes, home cooks relied on simple, garden-grown herbs and pantry staples to create hearty sides that stretched a meal. This stuffing celebrates that heritage—simple ingredients elevated by careful preparation and balance.
Even today, in an era of fast recipes and shortcuts, taking the time to chop, sauté, and bake from scratch gives the dish a sense of authenticity and pride that can’t be replicated.
Make It Ahead, Freeze It, or Store It
If you love planning ahead, this stuffing recipe is incredibly freezer-friendly:
-
To Freeze (Unbaked): Prepare the stuffing mixture, transfer it to a greased baking dish, and cover tightly with foil. Freeze for up to 2 months. When ready to use, thaw overnight in the refrigerator and bake as directed.
-
To Freeze (Baked): Allow baked stuffing to cool completely, then wrap tightly and freeze. Reheat covered with foil at 350°F for 20–25 minutes.
-
To Store (Refrigerated): Keep leftovers covered and chilled for up to 4 days. Reheat with a splash of broth to restore moisture.
Why You’ll Love This Recipe
-
Classic, comforting flavor – timeless sage and onion with buttery bread
-
Simple ingredients – pantry staples you already have
-
Perfect texture – soft inside, golden crisp on top
-
Flexible and adaptable – easily made vegetarian or customized
-
Make-ahead friendly – perfect for busy cooks
This recipe brings back the warmth and joy of homemade meals shared with family. Every bite reminds you that comfort doesn’t have to be complicated—it just needs to be made with care.
Common Questions About Classic Sage and Onion Stuffing
Can I make this stuffing ahead of time?
Absolutely! You can assemble the stuffing a day in advance and refrigerate it, covered. When ready to serve, simply bake it straight from the fridge—just add an extra 10 minutes to the baking time.
Can I make this stuffing without eggs?
Yes. The eggs help bind the stuffing, but they’re optional. If you skip them, just ensure your bread mixture is well-moistened before baking.
How do I store and reheat leftovers?
Store any leftovers in an airtight container in the refrigerator for up to 4 days. Reheat in the oven at 350°F for about 15 minutes, or microwave individual portions until warmed through.
Can I make this stuffing vegetarian?
Definitely. Use vegetable broth instead of chicken broth. The flavors remain hearty and satisfying, making it a great side for plant-based meals.

Classic Sage and Onion Stuffing Recipe
- Total Time: 1 hour 10 minutes
- Yield: 8 servings 1x
Description
A timeless, comforting side dish made with buttery onions, aromatic sage, and tender bread cubes baked to golden perfection. This traditional recipe captures the warmth of homemade cooking, making it perfect for family gatherings or cozy dinners. It’s simple, flavorful, and pairs beautifully with roasted poultry, vegetables, or hearty main courses.
Ingredients
-
10 cups day-old bread cubes (white or whole wheat)
-
1 cup unsalted butter
-
2 ½ cups yellow onions, finely chopped
-
1 ½ cups celery, chopped
-
3 tablespoons fresh sage, finely chopped (or 2 teaspoons dried)
-
2 tablespoons fresh parsley, chopped
-
1 teaspoon dried thyme
-
1 teaspoon salt (or to taste)
-
½ teaspoon black pepper
-
2 ½ to 3 cups vegetable or chicken broth (low sodium)
-
2 large eggs, lightly beaten (optional)
Instructions
-
Cut the bread into cubes and spread them on a baking sheet. Let them sit overnight to dry out, or bake at 300°F (150°C) for 10–15 minutes until slightly crisp.
-
In a large skillet, melt the butter over medium heat. Add the chopped onions and celery. Cook for about 10 minutes, stirring often, until the onions are soft and translucent.
-
Stir in the sage, thyme, parsley, salt, and pepper. Cook for another 2 minutes to blend the flavors.
-
Place the dried bread cubes in a large bowl. Pour the buttery onion mixture over the bread and toss gently to coat evenly.
-
Gradually pour in the broth, 1 cup at a time, tossing lightly after each addition. The bread should be moist but not soggy. If using eggs, stir them in at this stage.
-
Preheat the oven to 350°F (175°C). Grease a 9×13-inch baking dish, then transfer the stuffing mixture into the dish.
-
Cover with foil and bake for 30 minutes. Remove the foil and bake for an additional 15–20 minutes, until the top is golden and slightly crisp.
-
Serve warm as a flavorful side dish with roasted chicken, turkey, or vegetables.
Notes
-
Dry bread is key to the perfect stuffing texture; avoid using fresh bread.
-
Add broth gradually to prevent sogginess—stop when the mixture is just moist.
-
Fresh sage provides the best flavor, but dried works well too.
-
Make ahead by assembling the mixture a day early; cover and refrigerate until ready to bake.
-
For a vegetarian version, use vegetable broth instead of chicken broth.
-
For extra texture, mix in sautéed mushrooms, diced apples, or dried cranberries before baking.
- Prep Time: 20 minutes
- Cook Time: 50 minutes


