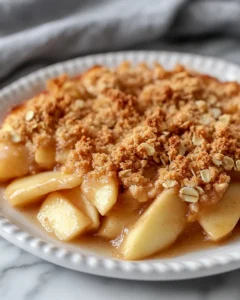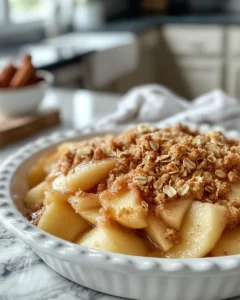
As the crisp autumn air fills the season with golden leaves and cozy evenings, there’s nothing quite like the comforting aroma of freshly baked apples mingling with warm spices. Harvest Apple Crisp Delight is the perfect dessert to bring that feeling of home right to your kitchen. Whether you’re planning a festive family gathering, a casual weekend brunch, or simply a quiet night in, this dessert promises a sweet, warm, and satisfying treat.
Inspired by classic harvest traditions, this recipe celebrates the bounty of fall apples. Imagine walking through a local orchard, picking crisp, juicy apples that are ready to transform into a dessert loved by everyone. This recipe captures that essence, blending tender baked apples with a crunchy topping that’s impossible to resist. It’s a dish that evokes memories, invites sharing, and fills your home with the scent of seasonal bliss.
Ingredients
For the Apple Filling:
-
6 medium apples (Granny Smith or Honeycrisp recommended), peeled, cored, and sliced
-
1/2 cup granulated sugar
-
1/4 cup brown sugar, packed
-
1 teaspoon ground cinnamon
-
1/4 teaspoon ground nutmeg
-
1 tablespoon lemon juice
-
2 teaspoons vanilla extract
-
2 tablespoons all-purpose flour
For the Crisp Topping:
-
1 cup old-fashioned rolled oats
-
1/2 cup all-purpose flour
-
1/2 cup brown sugar, packed
-
1/2 teaspoon ground cinnamon
-
1/4 teaspoon salt
-
1/2 cup unsalted butter, cold and cubed
Directions
Preheat the Oven
Start by preheating your oven to 350°F (175°C). While this may seem like a simple first step, it’s crucial for ensuring that your apple crisp bakes evenly. A properly preheated oven allows the apples to soften just right and the topping to become perfectly golden.
Next, lightly grease a 9×13-inch baking dish with butter or non-stick spray. Greasing the dish prevents sticking and makes it easier to serve your apple crisp without losing any of that beautiful, bubbling apple filling. For a touch of extra flavor, you can even rub a little cinnamon or nutmeg into the greased surface—this helps infuse subtle spice into every bite of your dessert.
Prepare the Apple Filling
The heart of your apple crisp is the filling. In a large mixing bowl, combine the following: sliced apples, granulated sugar, brown sugar, ground cinnamon, nutmeg, lemon juice, vanilla extract, and flour.
Tips for Mixing:
-
Toss the ingredients gently but thoroughly. Each apple slice should be evenly coated in the sugar and spice mixture. This ensures every bite is flavorful and balanced.
-
The flour helps thicken the apple juices as they bake, preventing the dessert from becoming too runny.
-
Lemon juice not only enhances flavor but also keeps the apples from browning while you prepare the topping.
Once mixed, the apple slices should have a glossy, slightly syrupy coating. This combination of sugar, spices, and apples is what gives the dessert its warm, aromatic character.
Transfer the Filling to the Baking Dish
Carefully pour the prepared apple mixture into your greased baking dish. Spread the apples evenly, making sure to distribute the slices uniformly across the pan.
Pro Tips:
-
Press the apples lightly with a spatula to create a compact layer. This helps the topping adhere better and ensures an even bake.
-
Avoid pressing too hard—you want the apples to retain their structure for a pleasant bite, not turn mushy.
-
Layering the apples properly will result in a dessert where every scoop has a perfect balance of fruit and crisp topping.
Make the Crisp Topping
In a separate bowl, combine the oats, flour, brown sugar, cinnamon, and salt. Mix these dry ingredients thoroughly. Then, add cold, cubed butter to the mixture.
Blending Tips:
-
Use a pastry cutter, fork, or even your fingers to incorporate the butter into the dry ingredients. The goal is a coarse, crumbly texture with small pea-sized clumps.
-
Avoid overmixing; if the butter melts too much, the topping can become dense instead of light and crispy.
-
The butter-rich topping is what will create that golden crunch and contrast beautifully with the tender baked apples below.
Assemble the Crisp
Now comes the fun part: combining the filling and topping. Sprinkle the oat mixture evenly over the apple filling, ensuring every inch of the apples is covered.
Assembly Tips:
-
Spread gently to avoid mixing the topping into the apples. You want a distinct layer that bakes to a crunchy finish.
-
Take a moment to pat down any thicker clumps. This helps them brown evenly during baking.
-
For an extra touch, you can lightly sprinkle a bit of cinnamon sugar over the top for enhanced color and flavor.
Bake to Perfection
Place your assembled apple crisp in the preheated oven. Bake for 45–50 minutes, or until the topping is golden brown and the apple juices are bubbling around the edges.
Baking Tips:
-
Keep an eye on the crisp during the last 10 minutes. If the topping is browning too quickly, cover it loosely with aluminum foil.
-
The bubbling juices signal that the apples are soft and the flavors are melding together beautifully.
-
Avoid opening the oven frequently, as this can lower the temperature and affect baking time.
Cool Slightly Before Serving
Once baked, remove the apple crisp from the oven and allow it to cool for at least 10 minutes. This resting period is crucial for a few reasons:
-
The juices will thicken slightly, making serving less messy.
-
Flavors will continue to develop, creating a richer, more aromatic dessert experience.
-
Cooling makes it easier to portion the crisp without it falling apart.
Serve and Enjoy
Spoon the warm apple crisp into bowls and serve immediately. For extra indulgence, add a scoop of vanilla ice cream or a dollop of whipped cream on top.
Serving Suggestions:
-
Enjoy it on its own for a classic autumn treat.
-
Pair with a hot cup of tea or coffee for a cozy evening dessert.
-
Garnish with a sprinkle of cinnamon or crushed nuts for added texture and visual appeal.
The magic of Harvest Apple Crisp Delight lies in the contrast between the tender, spiced apple filling and the crunchy, buttery topping. Each bite offers a harmonious blend of sweetness, spice, and texture, making this dessert a timeless favorite for fall and beyond.
Tips for the Perfect Apple Crisp
-
Apple Selection Matters: Use a mix of sweet and tart apples for depth of flavor. Granny Smith adds tang, while Honeycrisp or Fuji brings natural sweetness.
-
Cold Butter Is Key: Keeping the butter cold ensures the topping becomes crisp and crumbly rather than dense.
-
Adjust Sweetness: Taste your apples before baking. Depending on the sweetness of your apples, you may want to reduce or increase sugar slightly.
-
Make Ahead: You can prepare the apple filling and topping separately in advance and assemble just before baking. This is perfect for busy holiday mornings or spontaneous dessert cravings.
-
Leftovers: Store any leftover apple crisp in the refrigerator for up to 3 days. Reheat in the oven to retain crispiness.
Variations to Try
-
Nutty Twist: Add 1/2 cup chopped pecans or walnuts to the topping for extra crunch and flavor.
-
Caramel Drizzle: Drizzle caramel sauce over the baked crisp for a decadent finish.
-
Spiced Up: Include a pinch of ground cloves or ginger in the apple filling for a more robust spice profile.
-
Gluten-Free Option: Substitute all-purpose flour with a gluten-free blend and ensure your oats are certified gluten-free.
The Perfect Occasion for Harvest Apple Crisp Delight
This apple crisp is versatile enough for almost any autumn occasion. Serve it as a centerpiece dessert for Thanksgiving dinner, a cozy treat on a chilly evening, or even a weekend brunch highlight. Its homey, rustic look makes it ideal for family gatherings, while its complex flavors can impress guests at dinner parties.
The combination of warm spices, juicy apples, and crunchy topping makes this dessert a sensory experience. As the sweet aroma fills your home, you’ll find that baking this apple crisp isn’t just about creating a dessert—it’s about creating a warm, inviting atmosphere where memories are made and shared.
Healthier Tweaks Without Sacrificing Flavor
While Harvest Apple Crisp Delight is a comforting indulgence, there are ways to make it slightly healthier:
-
Reduce Sugar: Swap half of the sugar with natural sweeteners like maple syrup or honey.
-
Whole-Grain Topping: Use whole-wheat flour instead of all-purpose flour for a nuttier, fiber-rich topping.
-
Apples Only: Avoid extra sugar if your apples are naturally sweet varieties like Fuji or Gala.
-
Portion Control: Bake in individual ramekins for single servings. This helps with moderation while keeping presentation elegant.
Even with these tweaks, the apple crisp remains indulgent, flavorful, and satisfying, proving that comfort food can be balanced and nourishing.
Storage and Make-Ahead Tips
Refrigeration: Cover the apple crisp tightly with foil or plastic wrap and refrigerate for up to 3 days. Reheat in a 350°F oven for 10–15 minutes to restore crispness.
Freezing: You can freeze unbaked apple crisp in an airtight container for up to 2 months. Bake from frozen, adding extra 10–15 minutes to the baking time.
Advance Prep: Assemble the apple filling and topping the night before for a stress-free morning or holiday preparation. This allows the flavors to meld overnight, resulting in an even more flavorful dessert.
Why You’ll Love This Recipe
-
Easy to Make: With simple ingredients and straightforward steps, it’s perfect for both beginner and experienced bakers.
-
Crowd-Pleaser: Everyone loves a warm apple dessert, making this ideal for family gatherings or parties.
-
Customizable: Adjust the sweetness, spices, and topping to suit your taste or dietary preferences.
-
Seasonal Celebration: Highlights the best flavors of fall, making it perfect for harvesting the essence of the season.
Fun Serving Ideas
-
Serve in individual ramekins for a charming presentation.
-
Add a scoop of caramel or cinnamon ice cream for extra indulgence.
-
Sprinkle with chopped toasted nuts for added texture.
-
Top with a dollop of Greek yogurt for a tangy contrast to the sweet apples.
Frequently Asked Questions
1. Can I use frozen apples?
Yes, frozen apples can be used if fresh ones aren’t available. Thaw and drain them thoroughly to prevent excess liquid, which could make the topping soggy.
2. How do I prevent the topping from burning?
If the topping starts browning too quickly, cover the dish loosely with aluminum foil during the last 10 minutes of baking.
3. Can I make this recipe vegan?
Absolutely. Replace the butter with a plant-based alternative such as coconut oil or vegan butter, and ensure any additional toppings like whipped cream are also plant-based.
4. What is the best way to serve this dessert?
Warm from the oven is ideal. Pair it with vanilla ice cream, whipped cream, or even a drizzle of cream for a rich, comforting dessert experience.

Harvest Apple Crisp Delight Recipe
- Total Time: 1 hour 10 minutes
- Yield: 10 servings 1x
Description
A cozy autumn dessert that celebrates the season’s best flavors. Tender, spiced apples are baked under a buttery, crunchy oat topping, making it perfect for family gatherings, holiday dinners, or a comforting night in. The warm aroma and sweet-spiced flavor will fill your home with autumn bliss and leave everyone asking for seconds.
Ingredients
For the Apple Filling:
-
6 medium apples (Granny Smith or Honeycrisp), peeled, cored, and sliced
-
1/2 cup granulated sugar
-
1/4 cup brown sugar, packed
-
1 teaspoon ground cinnamon
-
1/4 teaspoon ground nutmeg
-
1 tablespoon lemon juice
-
2 teaspoons vanilla extract
-
2 tablespoons all-purpose flour
For the Crisp Topping:
-
1 cup old-fashioned rolled oats
-
1/2 cup all-purpose flour
-
1/2 cup brown sugar, packed
-
1/2 teaspoon ground cinnamon
-
1/4 teaspoon salt
-
1/2 cup unsalted butter, cold and cubed
Instructions
-
Preheat your oven to 350°F (175°C). Lightly grease a 9×13-inch baking dish with butter or non-stick spray.
-
In a large mixing bowl, combine sliced apples, granulated sugar, brown sugar, cinnamon, nutmeg, lemon juice, vanilla extract, and flour. Toss until apples are evenly coated.
-
Transfer the apple mixture to the prepared baking dish, spreading evenly and pressing lightly to pack the apples without crushing them.
-
In a separate bowl, mix oats, flour, brown sugar, cinnamon, and salt. Add cold cubed butter and blend with a pastry cutter, fork, or fingers until the mixture resembles coarse crumbs.
-
Evenly sprinkle the oat topping over the apple filling, ensuring all apples are covered.
-
Bake for 45–50 minutes, or until the topping is golden and the apples are bubbling. Cover loosely with foil if the topping browns too quickly.
-
Remove from the oven and cool for at least 10 minutes to let the juices thicken.
-
Serve warm, optionally with vanilla ice cream or whipped cream.
Notes
-
Use a mix of sweet and tart apples for balanced flavor.
-
Cold butter is essential for a crisp, golden topping.
-
Store leftovers in the refrigerator for up to 3 days; reheat to maintain crispiness.
-
Optional variations: add nuts to the topping, drizzle with caramel, or use a gluten-free flour blend.
- Prep Time: 20 minutes
- Cook Time: 50 minutes


