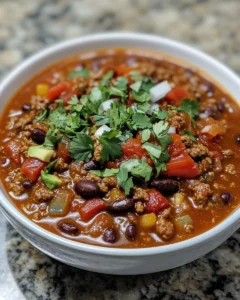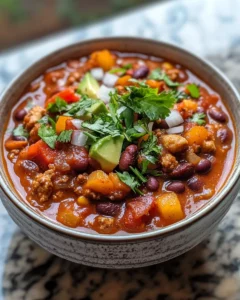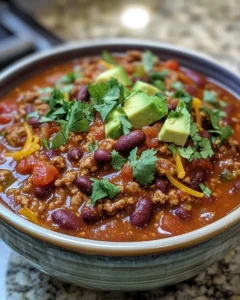
There’s something undeniably comforting about a steaming bowl of chili on a chilly evening. The rich aroma of roasted tomatoes, the depth of perfectly balanced spices, and the hearty combination of beans and vegetables make Fire-Roasted Tomato Chili the ultimate cozy meal. Whether you’re hosting a casual dinner for friends, preparing a weeknight family dinner, or simply craving something that warms you from the inside out, this chili delivers comfort in every bite.
This recipe was inspired by a love for robust, smoky flavors and the timeless tradition of chili cook-offs in American kitchens. Roasting the tomatoes before blending them into the chili brings a deep, slightly smoky flavor that elevates a classic dish into something extraordinary. It’s simple enough for busy evenings yet impressive enough to serve at a weekend gathering. Once you taste it, you’ll understand why fire-roasted tomatoes have become a favorite secret ingredient in home kitchens.
Ingredients
For the Chili:
-
2 tablespoons olive oil
-
1 large onion, finely chopped
-
3 cloves garlic, minced
-
2 bell peppers (any color), diced
-
2 cans (14.5 oz each) fire-roasted diced tomatoes
-
1 can (15 oz) tomato sauce
-
1 can (15 oz) black beans, drained and rinsed
-
1 can (15 oz) kidney beans, drained and rinsed
-
1 can (15 oz) pinto beans, drained and rinsed
-
1 cup vegetable or chicken broth
-
1 tablespoon chili powder
-
1 teaspoon smoked paprika
-
1 teaspoon cumin
-
½ teaspoon cayenne pepper (adjust to taste)
-
1 teaspoon dried oregano
-
Salt and freshly ground black pepper, to taste
-
Optional: 1 teaspoon brown sugar for a touch of sweetness
For Serving:
-
Fresh cilantro, chopped
-
Shredded cheddar cheese
-
Sour cream or Greek yogurt
-
Lime wedges
-
Crusty bread or tortilla chips
Directions
1. Prepare the Aromatics
Begin by heating the olive oil in a large, heavy-bottomed pot or Dutch oven over medium heat. Allow the oil to shimmer slightly before adding the chopped onion. Sauté the onion for 5–7 minutes, stirring occasionally, until it becomes soft, translucent, and slightly golden. The slow cooking process draws out the natural sweetness of the onion and creates a flavorful foundation for the chili.
Next, add the minced garlic to the pot and cook for an additional 1–2 minutes. Garlic should be gently softened, not browned, to avoid a bitter taste. As the aroma fills the kitchen, you’ll notice how these simple ingredients begin to build a rich, warm base. Taking your time at this stage ensures that each layer of flavor in the chili will be pronounced, making the final dish far more satisfying than if you rush through this step.
2. Add the Bell Peppers
Once the aromatics are ready, incorporate the diced bell peppers into the pot. Stir them into the onions and garlic, allowing them to cook evenly. Sauté the peppers for 3–5 minutes, until they soften slightly but still retain a bit of bite. Bell peppers contribute a subtle sweetness that balances the smoky and spicy notes from the fire-roasted tomatoes and chili spices.
While the peppers cook, occasionally stir the mixture to prevent sticking and ensure uniform cooking. If your peppers are larger or denser, you may need an extra minute or two. By gently softening the peppers, you preserve their natural flavor and texture, which adds complexity to the final chili.
3. Incorporate the Fire-Roasted Tomatoes
Next, pour in the fire-roasted diced tomatoes along with the tomato sauce. Stir thoroughly to combine all the ingredients. The fire-roasted flavor brings a smoky richness that distinguishes this chili from standard tomato-based recipes. Allow the mixture to simmer uncovered for about 10 minutes.
During this simmering step, the flavors begin to meld, and the tomatoes release their juices, creating a hearty, thick base. Occasionally stir to prevent the mixture from sticking to the bottom of the pot, scraping gently if needed. The smoky depth of the fire-roasted tomatoes develops as it cooks, setting the stage for a chili that is layered, robust, and full of character.
4. Add the Beans and Broth
Now it’s time to add the beans. Drain and rinse the black beans, kidney beans, and pinto beans before stirring them into the tomato mixture. These legumes provide protein, texture, and a satisfying heartiness to the chili.
Next, pour in the vegetable or chicken broth. Adjust the amount depending on your preferred consistency. For a thicker chili, use slightly less broth; for a soupier version, add more. Stir well to evenly distribute the beans and liquid. This step ensures that the chili has a well-balanced texture, neither too thick nor too runny, creating the perfect canvas for the spices to shine.
5. Season the Chili
Add your seasonings: chili powder, smoked paprika, cumin, cayenne pepper, dried oregano, salt, and freshly ground black pepper. Stir thoroughly to incorporate the spices throughout the mixture. Taste as you go, adjusting the seasoning to match your preferences. If desired, stir in a teaspoon of brown sugar to counteract the acidity of the tomatoes and bring a subtle, balanced sweetness.
Seasoning at this stage allows the spices to bloom as the chili simmers, creating a rich, nuanced flavor that permeates every spoonful. Don’t be afraid to adjust quantities based on your heat tolerance or personal taste—it’s easier to add more than to correct an over-spiced chili later.
6. Simmer for Maximum Flavor
Bring the chili to a gentle boil, then reduce the heat to low and cover the pot. Allow the chili to simmer for at least 30–40 minutes, stirring occasionally to prevent sticking and to ensure even cooking. The simmering process is critical, as it allows the flavors to develop fully and meld together, producing a deep, satisfying taste.
For an even richer flavor, let the chili simmer for up to an hour or longer if time allows. Longer cooking encourages the tomatoes, beans, and spices to blend harmoniously, creating a thick, hearty chili that’s bursting with flavor.
7. Taste and Adjust
Before serving, taste the chili and adjust the seasonings as necessary. Sometimes a pinch more salt, a dash of smoked paprika, or a squeeze of lime juice can elevate the flavor profile. This final tasting ensures that each component is balanced and every bite is flavorful.
8. Serve with Toppings
Ladle the chili into bowls and serve with your favorite toppings. Freshly chopped cilantro adds brightness, while shredded cheddar cheese melts over the hot chili for a rich, creamy touch. A dollop of sour cream or Greek yogurt provides tang and smoothness, and a squeeze of lime juice adds a refreshing zing. Serve alongside crusty bread or tortilla chips to complete the meal. Each element contributes to a satisfying, visually appealing, and shareable dish that is perfect for any occasion.
Tips for the Perfect Fire-Roasted Tomato Chili
1. Choose Quality Fire-Roasted Tomatoes:
Using high-quality fire-roasted tomatoes makes a significant difference. Look for canned tomatoes labeled “fire-roasted” for that authentic smoky flavor that brings the chili to life.
2. Spice Adjustments:
Adjust the level of heat based on your taste preferences. Cayenne pepper can be increased for a spicier chili, while reducing it will make it milder and more family-friendly.
3. Make Ahead and Storage:
Chili tastes even better the next day as the flavors continue to meld. Prepare a large batch and refrigerate for up to 4 days or freeze individual portions for quick meals throughout the week.
4. Customize the Beans:
Feel free to use any combination of beans you prefer. Chickpeas or cannellini beans can also be excellent alternatives.
5. Add Extra Veggies:
Carrots, corn, zucchini, or even butternut squash can add texture and nutrients to your chili. Chop them small so they cook evenly during the simmering process.
6. For a Thicker Chili:
If you prefer a thicker chili, allow it to simmer uncovered for longer, or mash a few beans with a spoon to naturally thicken the sauce.
7. Pairing Suggestions:
Fire-roasted tomato chili pairs beautifully with cornbread, steamed rice, or baked potatoes. For a lighter option, serve over a bed of leafy greens.
Why This Chili Stands Out
The secret behind this chili’s exceptional flavor is the fire-roasted tomatoes. Roasting intensifies the natural sweetness of the tomatoes while imparting a subtle smokiness that blends seamlessly with the chili spices. Combined with the earthy richness of beans and aromatic vegetables, every bite is a perfect balance of smoky, spicy, and savory flavors.
Unlike traditional tomato-based chili recipes, fire-roasted tomatoes add depth without needing any alcohol, making this dish perfect for all audiences, including families and those avoiding alcohol. It’s a meal that can be enjoyed at any time of year, whether you’re seeking comfort on a rainy evening or hosting a casual game-day gathering.
Health Benefits
While indulgent in flavor, this chili is surprisingly nutritious. It’s packed with protein from beans, fiber from vegetables and legumes, and essential vitamins and minerals. Tomatoes provide a rich source of antioxidants, particularly lycopene, which supports heart health. Bell peppers add vitamin C and A, while beans offer sustained energy and promote digestive health. This makes fire-roasted tomato chili not only comforting but a wholesome, hearty meal.
Variations to Try
1. Veggie-Packed Chili:
Increase the vegetables and reduce the beans for a lighter version loaded with bell peppers, zucchini, carrots, and corn.
2. Spicy Chili:
Add fresh chopped jalapeños or a dash of hot sauce to increase the heat.
3. Smoky Chipotle Twist:
Mix in a small amount of chipotle in adobo sauce for a smoky, slightly tangy chili variation.
4. Chili with Quinoa:
For added protein and texture, stir in cooked quinoa during the last 10 minutes of simmering.
5. Instant Pot or Slow Cooker Version:
This recipe adapts well to slow cookers or pressure cookers. Simply sauté the aromatics first, then combine all ingredients and cook on low for 6–8 hours or high for 3–4 hours in a slow cooker.
Meal Prep and Storage Tips
-
Make Ahead: Prepare chili a day in advance to allow flavors to deepen.
-
Refrigerate: Store in airtight containers for up to 4 days.
-
Freeze: Portion into freezer-safe containers for 2–3 months.
-
Reheat: Gently warm on the stovetop or in the microwave, adding a splash of broth if needed.
Batch cooking this chili ensures you have a ready-to-go meal for busy weekdays or spontaneous gatherings. Pairing it with fresh toppings and sides elevates it from simple comfort food to a memorable, shareable meal.
Pairing Ideas
Breads and Grains: Serve with cornbread, garlic bread, rice, or quinoa for a complete meal.
Toppings: Fresh cilantro, sliced avocado, diced onions, shredded cheese, or a dollop of Greek yogurt enhances both flavor and presentation.
Drinks: For a non-alcoholic pairing, try iced tea, sparkling water, or a citrusy mocktail.
Side Salads: A crisp green salad with vinaigrette balances the richness of the chili.
Frequently Asked Questions
Can I make this chili vegan?
Yes, simply use vegetable broth and ensure all toppings are plant-based.
Can I use fresh tomatoes instead of canned fire-roasted?
You can, but roasting fresh tomatoes first is essential to replicate the smoky depth of flavor.
How long will this chili last?
Stored in the refrigerator, it lasts up to 4 days. It can be frozen for up to 3 months.
Can I make it spicier?
Absolutely! Add extra cayenne, chili powder, or fresh chili peppers according to your preference.

Fire-Roasted Tomato Chili Recipe
- Total Time: 1 hour 15 minutes
- Yield: 6–8 servings 1x
Description
There’s nothing quite like the comfort of a warm bowl of chili on a cool evening. Fire-roasted tomatoes give this chili a smoky depth, while beans and vegetables create a hearty, filling dish that’s perfect for family dinners, casual gatherings, or a cozy night in. Inspired by the flavors of classic chili cook-offs, this recipe elevates the traditional tomato base with fire-roasted goodness, producing a rich, aromatic, and satisfying meal. Every spoonful is layered with flavor, making it a dish you’ll want to share with loved ones and revisit again and again.
Ingredients
-
2 tablespoons olive oil
-
1 large onion, finely chopped
-
3 cloves garlic, minced
-
2 bell peppers, diced
-
2 cans (14.5 oz each) fire-roasted diced tomatoes
-
1 can (15 oz) tomato sauce
-
1 can (15 oz) black beans, drained and rinsed
-
1 can (15 oz) kidney beans, drained and rinsed
-
1 can (15 oz) pinto beans, drained and rinsed
-
1 cup vegetable or chicken broth
-
1 tablespoon chili powder
-
1 teaspoon smoked paprika
-
1 teaspoon cumin
-
½ teaspoon cayenne pepper (adjust to taste)
-
1 teaspoon dried oregano
-
Salt and freshly ground black pepper, to taste
-
Optional: 1 teaspoon brown sugar
-
For serving: fresh cilantro, shredded cheddar cheese, sour cream or Greek yogurt, lime wedges, crusty bread or tortilla chips
Instructions
-
Prepare the Aromatics
Heat olive oil in a large pot or Dutch oven over medium heat. Add chopped onion and sauté for 5–7 minutes until soft and translucent. Stir in garlic and cook 1–2 minutes until fragrant. -
Add the Bell Peppers
Stir in diced bell peppers and sauté for 3–5 minutes until slightly softened. Keep stirring occasionally to ensure even cooking. -
Incorporate the Fire-Roasted Tomatoes
Pour in the fire-roasted tomatoes and tomato sauce. Stir to combine and simmer uncovered for 10 minutes, allowing flavors to meld. -
Add the Beans and Broth
Stir in drained black beans, kidney beans, and pinto beans. Add vegetable or chicken broth to reach desired consistency and stir well. -
Season the Chili
Add chili powder, smoked paprika, cumin, cayenne pepper, dried oregano, salt, and pepper. Stir to combine. Optional: add brown sugar to balance acidity. -
Simmer for Maximum Flavor
Bring chili to a gentle boil, reduce heat to low, cover, and simmer for 30–40 minutes, stirring occasionally. For deeper flavor, simmer up to 1 hour. -
Taste and Adjust
Taste and adjust seasonings as needed. Add extra salt, spices, or a squeeze of lime juice to enhance flavor. -
Serve with Toppings
Ladle chili into bowls and garnish with fresh cilantro, shredded cheese, sour cream or Greek yogurt, and lime juice. Serve with crusty bread or tortilla chips.
Notes
-
Chili tastes better the next day as flavors meld.
-
Adjust spiciness with cayenne pepper or fresh chili.
-
Freeze leftovers for up to 3 months.
-
Add extra vegetables like zucchini, corn, or carrots for variation.
- Prep Time: 15 minutes
- Cook Time: 1 hour


