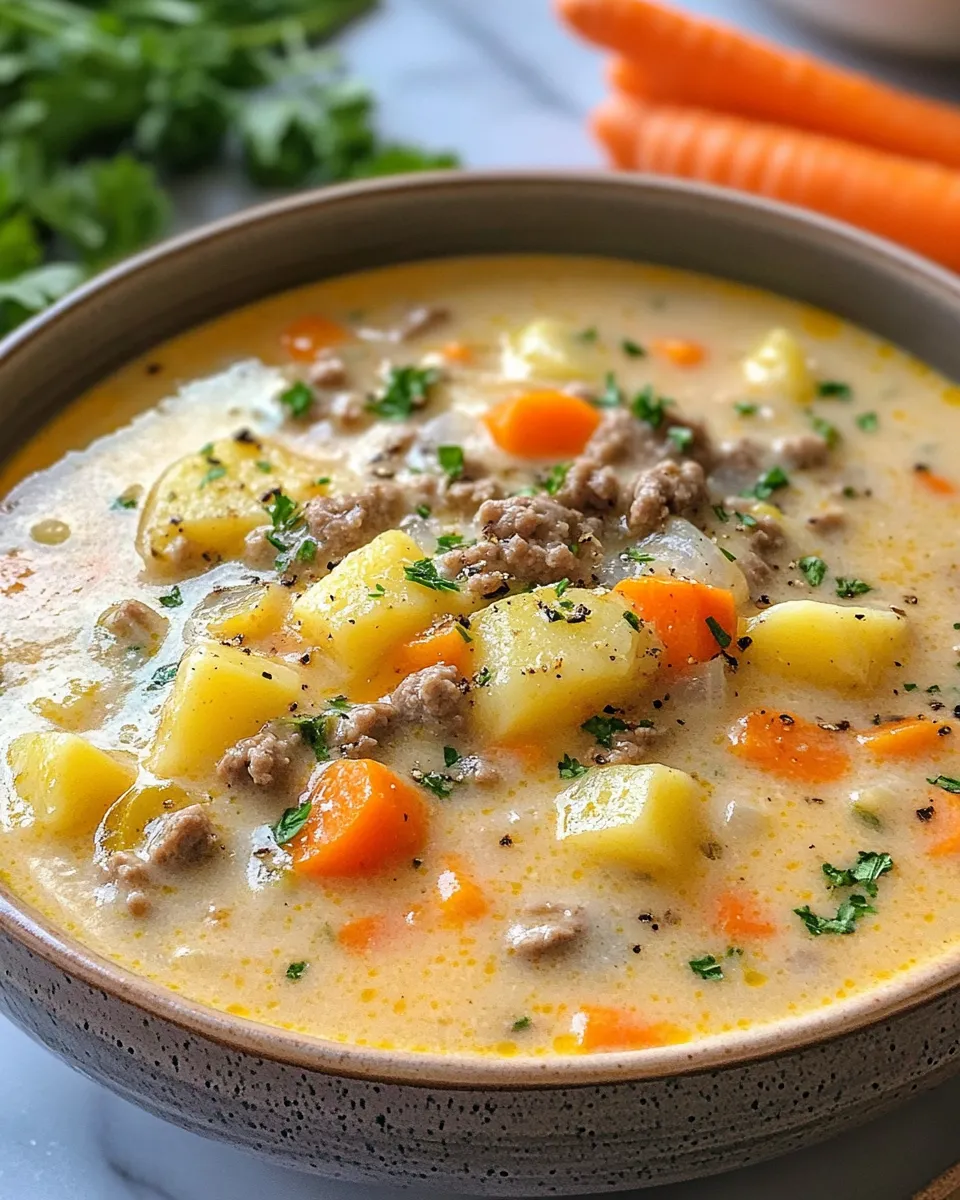
There are some meals that instantly transport you to a place of comfort, warmth, and togetherness, and Cheesy Cattle Drive Casserole is one of them. This is the kind of dish that feels right at home on the table after a long day, when everyone is hungry and craving something hearty and satisfying. Imagine a cozy evening with family gathered around, the aroma of bubbling cheese filling the kitchen, and a single dish that promises both ease and indulgence.
The inspiration behind this casserole comes from classic homestyle cooking, where simple ingredients are transformed into something deeply comforting. It echoes the spirit of rustic, ranch-style meals that were designed to fuel hardworking days and bring people together at night. Rich, cheesy, and generously layered, this casserole is a modern comfort classic that you will find yourself making again and again.
Why You’ll Love This Cheesy Cattle Drive Casserole
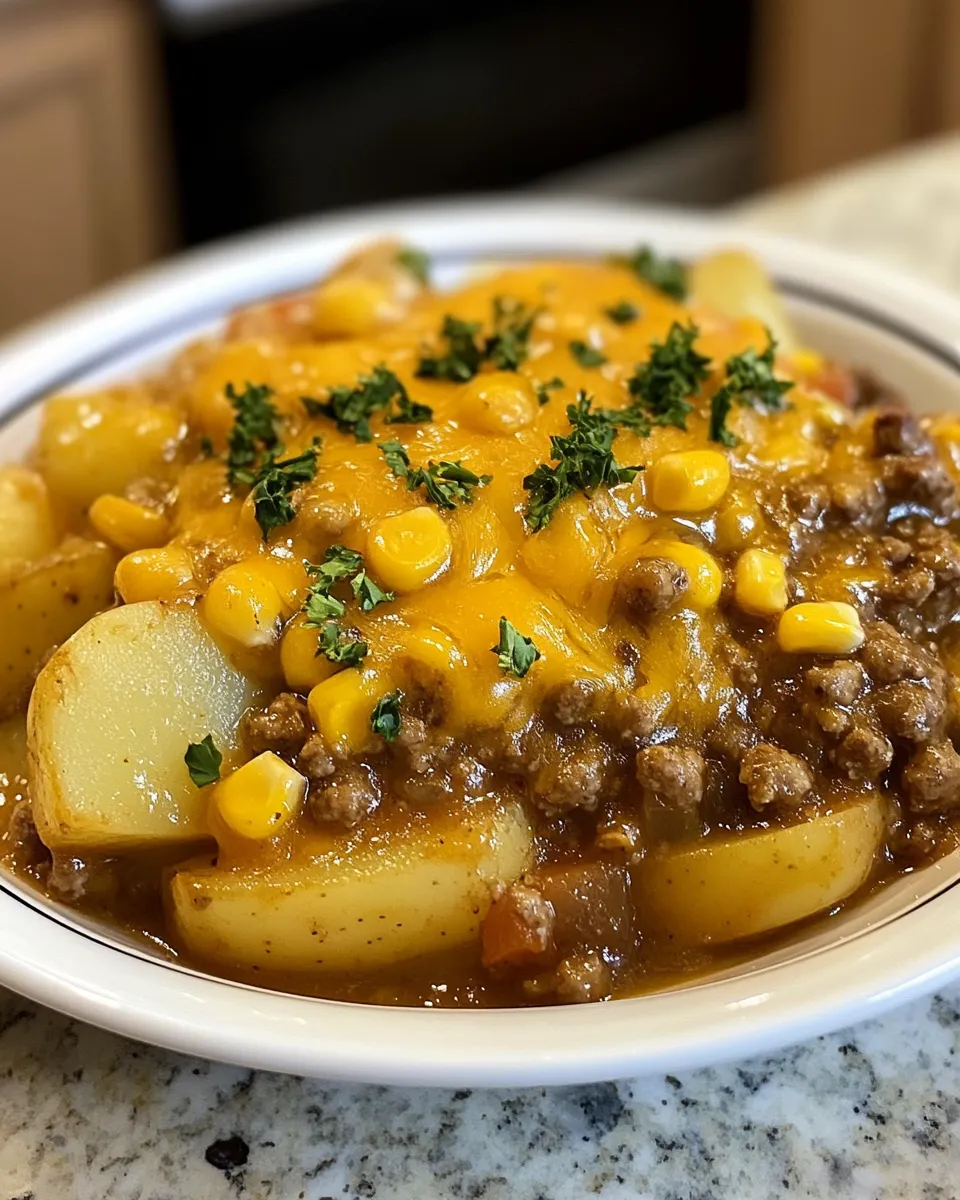
This casserole checks every box for a reliable family favorite. It is rich without being overwhelming, hearty without being heavy, and packed with familiar flavors that appeal to both kids and adults. The combination of seasoned ground beef, tender pasta, and a creamy, cheesy sauce creates a balanced bite every time.
Another reason this recipe shines is its versatility. It works just as well for a casual weeknight dinner as it does for a potluck or gathering. It can be prepped ahead, baked fresh, and even reheated beautifully. If you enjoy meals that feel indulgent but are simple to prepare, this casserole will quickly earn a permanent spot in your recipe rotation.
Ingredients You’ll Need
To make this comforting casserole, gather the following ingredients. All measurements are provided to ensure consistent and delicious results.
-
450 g ground beef
-
1 tablespoon olive oil
-
1 medium onion, finely chopped (about 150 g)
-
2 cloves garlic, minced
-
1 teaspoon paprika
-
1 teaspoon ground cumin
-
1 teaspoon salt
-
½ teaspoon black pepper
-
240 g uncooked pasta (elbow macaroni or rotini work well)
-
240 ml beef broth
-
240 ml milk
-
170 g cream cheese, softened
-
200 g shredded cheddar cheese
-
100 g shredded mozzarella cheese
-
120 g canned corn, drained
-
120 g canned diced tomatoes, drained
-
1 tablespoon chopped fresh parsley (optional, for garnish)
Step-by-Step Instructions
Prepare the Oven and Baking Dish
Begin by preheating your oven to 180°C. This step is essential because a fully heated oven ensures the casserole bakes evenly from the moment it goes in. While the oven warms up, lightly grease a medium-sized baking dish using oil or butter. Greasing the dish prevents sticking and makes serving and cleanup much easier later. Choose a dish that is deep enough to hold all the layers comfortably, allowing the casserole to bubble without spilling over.
Cook the Pasta to the Perfect Texture
Bring a large pot of water to a rolling boil and season it generously with salt. Properly salted water enhances the flavor of the pasta from the inside out. Add the pasta and cook according to the package instructions, stopping just when it reaches an al dente texture. This is crucial because the pasta will continue to cook in the oven. Overcooking it at this stage could result in a soft or mushy casserole. Drain the pasta thoroughly and set it aside so it is ready to incorporate later.
Sauté the Onion for a Flavorful Base
Heat the olive oil in a large skillet over medium heat. Once the oil is warm, add the chopped onion. Cook for about 3 to 4 minutes, stirring occasionally, until the onion becomes soft and translucent. This step builds the foundation of flavor for the entire dish. Softened onions release natural sweetness, which balances the savory richness of the beef and cheese that follow.
Brown the Ground Beef Thoroughly
Add the ground beef to the skillet with the onions. Use a wooden spoon or spatula to break the meat apart as it cooks. Browning the beef properly is important for both texture and taste. Allow it to cook until no pink remains and the meat is evenly browned. This step ensures the beef develops a deeper, more satisfying flavor that will carry through the casserole.
Add Aromatics and Seasonings
Once the beef is cooked, stir in the minced garlic, paprika, cumin, salt, and black pepper. Cook this mixture for about 30 seconds. Heating the spices briefly allows them to bloom, releasing their aromas and intensifying their flavor. Be careful not to overcook the garlic, as it can become bitter if left too long over heat.
Create the Creamy Sauce
Lower the heat to prevent scorching, then add the cream cheese, milk, and beef broth to the skillet. Stir continuously as the cream cheese melts into the liquid. Patience is key here. Gradual melting and steady stirring help create a smooth, velvety sauce without lumps. This creamy base is what binds the casserole together and gives it its signature comforting texture.
Combine Pasta, Vegetables, and Cheese
Add the cooked pasta to the skillet, followed by the corn, diced tomatoes, and half of the shredded cheddar cheese. Stir gently but thoroughly, making sure every piece of pasta is coated in the creamy sauce. The vegetables add subtle sweetness and texture, while the cheese melts slightly, enriching the mixture without overpowering it.
Assemble the Casserole
Transfer the mixture into the prepared baking dish. Use a spatula to spread it evenly, ensuring consistent layers throughout. An even surface helps the casserole bake uniformly and makes serving easier once it is done.
Add the Final Cheese Topping
Sprinkle the remaining cheddar cheese and all of the mozzarella cheese evenly over the top. This layer creates a golden, bubbly crust as it bakes, adding both visual appeal and irresistible texture. The combination of cheeses ensures a balance of flavor and stretch.
Bake Until Bubbling and Golden
Place the casserole in the preheated oven and bake for 25 to 30 minutes. You will know it is ready when the cheese is fully melted, bubbling around the edges, and lightly golden on top. Avoid overbaking, as this can dry out the dish.
Rest and Garnish Before Serving
Remove the casserole from the oven and let it rest for about 5 minutes. This resting time allows the sauce to settle, making it easier to serve clean portions. If desired, garnish with chopped parsley for a fresh finish before bringing it to the table.

Tips for the Perfect Casserole
One of the keys to a great casserole is balancing texture and flavor. Cooking the pasta just until al dente ensures it does not become mushy after baking. Using a combination of cheddar and mozzarella creates a rich flavor with excellent meltability.
Allowing the casserole to rest briefly after baking helps the layers set, making it easier to serve. If you like a slightly crispy top, you can switch the oven to broil for the last 2–3 minutes, watching closely to avoid burning.
Make-Ahead and Storage Suggestions
This casserole is ideal for busy schedules. You can assemble it up to 24 hours in advance, cover it tightly, and refrigerate until ready to bake. When baking from cold, add an extra 5–10 minutes to the cooking time.
Leftovers can be stored in an airtight container in the refrigerator for up to 3 days. Reheat individual portions in the oven or microwave until warmed through.
Frequently Asked Questions
1. Can I use a different type of pasta in this casserole?
Absolutely. While elbow macaroni and rotini are popular choices because they hold the sauce well, this recipe is flexible. Penne, shells, or fusilli also work nicely. The key is choosing a pasta shape with ridges or curves that can capture the creamy cheese sauce. Avoid very thin pasta, as it may overcook during baking and lose its structure.
When substituting pasta shapes, keep the measurement the same at 240 g and cook until just al dente. This ensures the final texture remains satisfying rather than soft or mushy.
2. How can I make this casserole creamier without overpowering it?
If you prefer an extra-creamy casserole, there are a few subtle ways to achieve that without overwhelming the dish. You can add an extra 60 ml of milk or a small additional portion of cream cheese, about 30 g. Stir it in gently while the sauce is warming so it blends smoothly.
Another option is to reserve a small amount of shredded cheese and mix it directly into the sauce before baking, rather than only sprinkling it on top. This creates a more luxurious interior while maintaining a balanced flavor.
3. Is this casserole suitable for freezing?
Yes, Cheesy Cattle Drive Casserole freezes very well. For best results, assemble the casserole but do not bake it. Cover it tightly with both plastic wrap and foil, then freeze for up to 2 months. When ready to use, thaw it overnight in the refrigerator.
Bake as directed, adding 10–15 minutes to the cooking time if it is still slightly chilled. Freezing after baking is also possible, though the texture of the pasta may be slightly softer upon reheating.
4. Can I add vegetables to make it more balanced?
This casserole is very adaptable, and adding vegetables is an excellent way to customize it. Chopped bell peppers, zucchini, or mushrooms can be sautéed with the onion and beef for extra flavor. Spinach can be stirred into the sauce just before baking, where it will wilt perfectly.
When adding vegetables, avoid excess moisture by cooking them first or draining them well. This keeps the sauce creamy and prevents the casserole from becoming watery.
Serving Suggestions
Serve this casserole with a simple green salad dressed lightly with lemon and olive oil to balance the richness. Steamed vegetables or roasted carrots also make excellent side dishes. For a casual family meal, warm bread or rolls pair beautifully with the creamy, cheesy texture.
This dish is filling on its own, making it a complete meal that does not require much else on the table. Its comforting flavors make it especially popular with children, while adults appreciate its depth and heartiness.
Final Thoughts
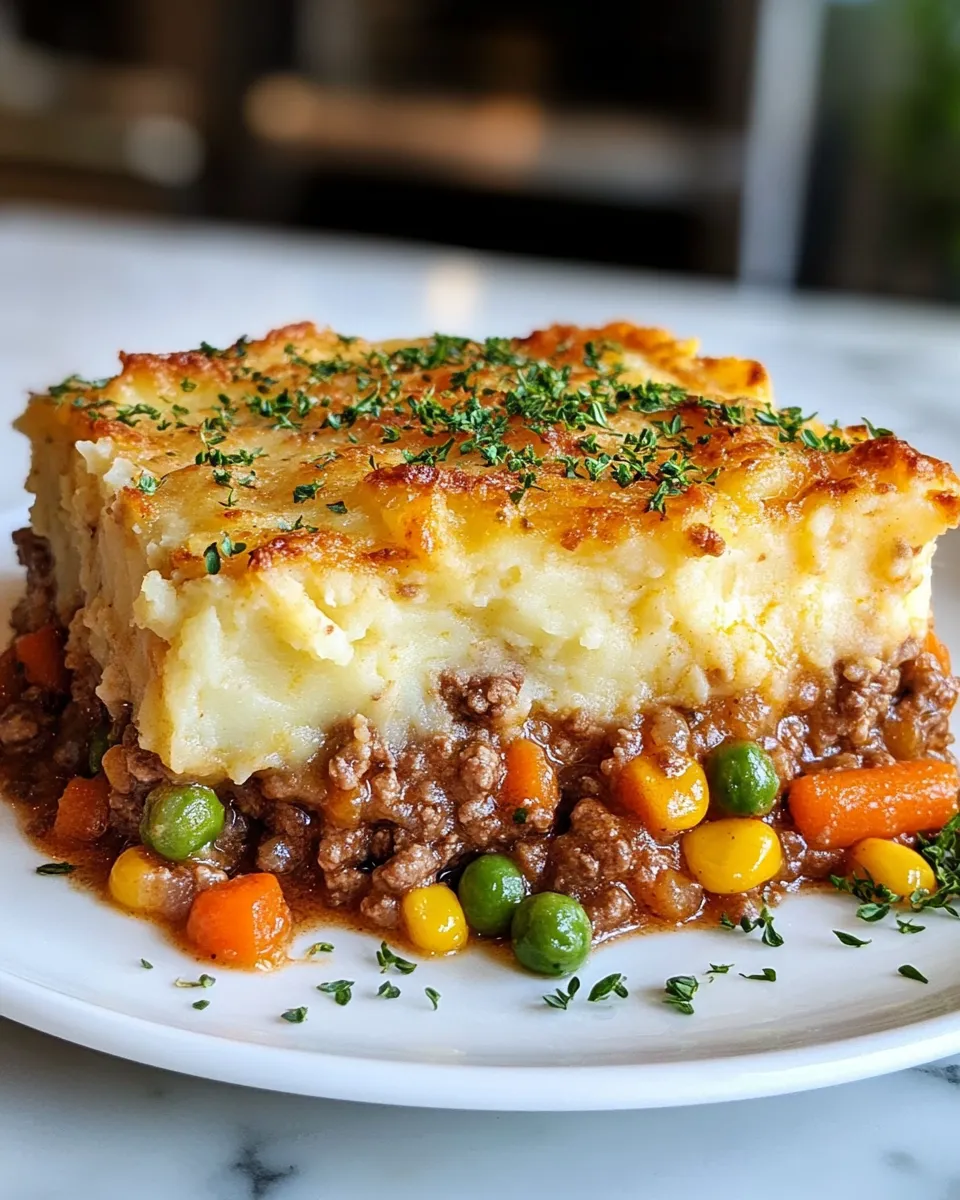
Cheesy Cattle Drive Casserole is more than just a baked dish; it is a reminder of how satisfying simple, well-prepared food can be. Every layer brings together familiar ingredients in a way that feels generous, comforting, and reliable. It is the kind of recipe that becomes part of your regular rotation not because it is complicated, but because it consistently delivers warmth and flavor.
What truly sets this casserole apart is its adaptability. Whether you are cooking for a crowd, preparing meals ahead of time, or simply looking for a dependable dinner idea, this recipe rises to the occasion. It invites creativity, allowing you to adjust spices, cheeses, or add-ins while still maintaining its core appeal.
In a world of fast meals and fleeting food trends, this casserole stands as a timeless option. It encourages you to slow down, gather your loved ones, and enjoy a meal that feels both indulgent and comforting. Once you try it, you will understand why this Cheesy Cattle Drive Casserole is one you will crave again and again.
Print
Cheesy Cattle Drive Casserole You’ll Crave
- Total Time: 50 minutes
- Yield: 4–6 servings 1x
Description
A rich, comforting baked casserole loaded with seasoned beef, pasta, and layers of melted cheese, perfect for family dinners and make-ahead meals.
Ingredients
-
450 g ground beef
-
1 tablespoon olive oil
-
1 medium onion, finely chopped (150 g)
-
2 cloves garlic, minced
-
1 teaspoon paprika
-
1 teaspoon ground cumin
-
1 teaspoon salt
-
½ teaspoon black pepper
-
240 g uncooked pasta
-
240 ml beef broth
-
240 ml milk
-
170 g cream cheese, softened
-
200 g shredded cheddar cheese
-
100 g shredded mozzarella cheese
-
120 g canned corn, drained
-
120 g canned diced tomatoes, drained
-
1 tablespoon chopped parsley (optional)
Instructions
-
Preheat oven to 180°C and grease a baking dish.
-
Cook pasta until al dente, drain, and set aside.
-
Sauté onion in olive oil, then brown the ground beef.
-
Add garlic and spices, cooking until fragrant.
-
Stir in cream cheese, milk, and broth until smooth.
-
Mix in pasta, corn, tomatoes, and half the cheese.
-
Transfer to baking dish and top with remaining cheese.
-
Bake for 25–30 minutes until bubbly and golden.
Notes
-
Let the casserole rest for 5 minutes before serving for best texture.
-
Adjust seasoning to taste before baking.
-
This dish can be prepared ahead and refrigerated for up to 24 hours before baking.
- Prep Time: 20 minutes
- Cook Time: 30 minutes