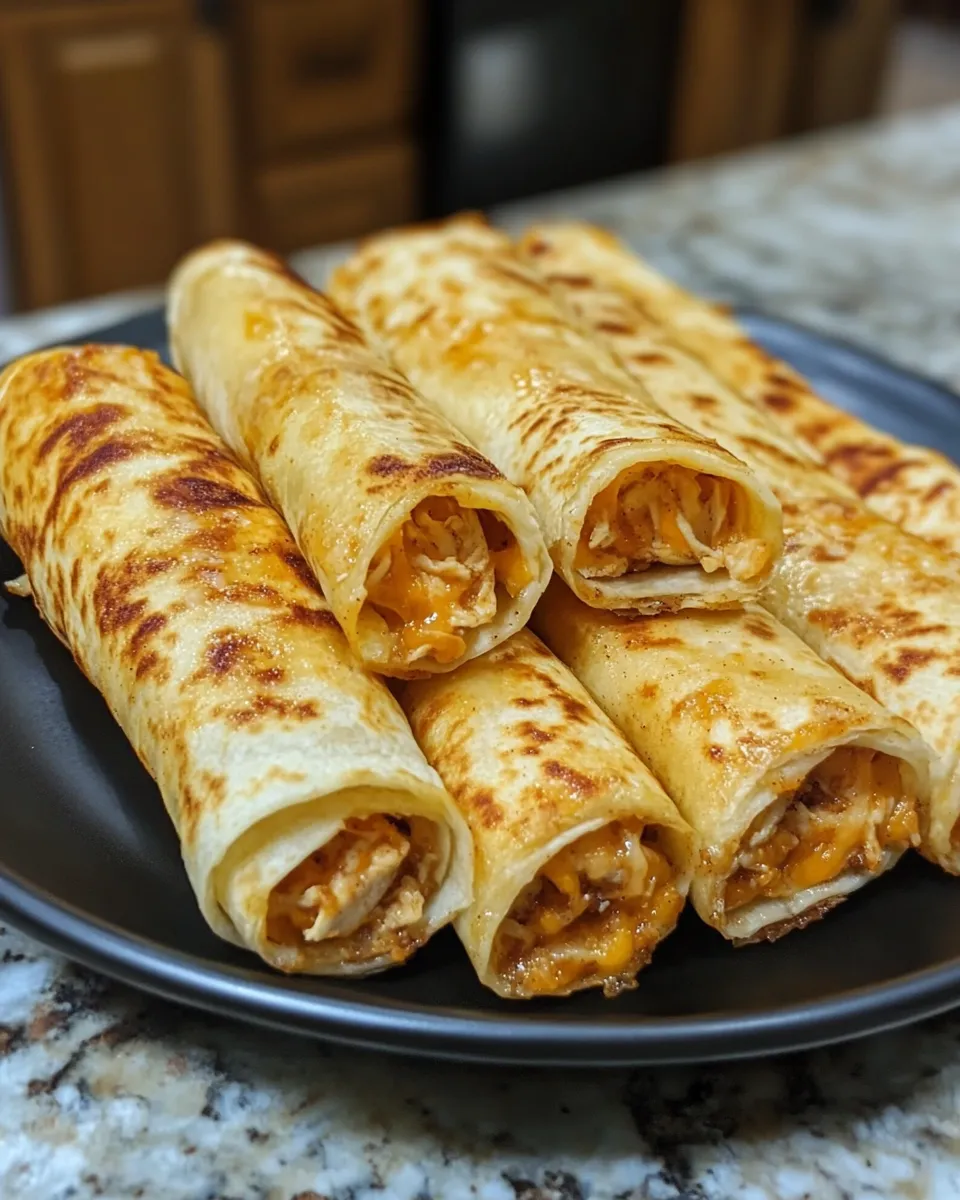
There are few kitchen moments more comforting than hearing bread sizzle against a hot pan and watching cheese melt into gooey perfection. These Cheesy, Crispy Grilled Cheese Roll-Ups are inspired by those cozy afternoons when you crave something simple, satisfying, and warm—but with a fun twist. Imagine the nostalgic appeal of a classic grilled cheese combined with the playful, bite-sized charm of a handheld snack. Whether you’re planning a relaxed weekend lunch, a movie-night treat, or a creative appetizer for guests, these roll-ups always deliver that irresistible blend of crunchy and melty. Their versatility makes them even more delightful; you can personalize them with veggies, herbs, or spices—all without complicating the process. This recipe celebrates comfort food at its best: accessible, quick, and endlessly customizable.
Why You’ll Love These Grilled Cheese Roll-Ups
These roll-ups take everything beloved about grilled cheese—crispy bread and molten cheese—and give it a modern, interactive twist. Instead of a flat sandwich, each slice of bread is flattened, filled, rolled, and toasted until each bite bursts with rich, cheesy flavor. They cater to both kids and adults, fitting seamlessly into busy schedules while offering gourmet potential through simple add-ins.
Their small size makes them ideal for dipping into soups, sauces, or enjoying on their own. The texture contrast alone—crunchy exterior with a smooth, buttery melt inside—makes them highly crave-worthy. You also control the intensity of flavor by choosing mild or sharp cheeses, mixing varieties, or adding aromatic herbs and vegetables. They’re budget-friendly, quick to prepare, and perfect for batch-cooking.
Ingredients and Customization Ideas
To create the perfect grilled cheese roll-up, balance is key. You want bread soft enough to roll but sturdy enough to crisp beautifully. The cheese should melt easily but not ooze excessively. Add-ins should complement, not overpower.
Here’s what you’ll need:
Base Ingredients
-
8 slices white or wheat sandwich bread
-
1 cup (113g) shredded cheddar cheese
-
1 cup (113g) shredded mozzarella cheese
-
3 tablespoons (42g) softened butter
-
1 teaspoon (2g) garlic powder
-
1 teaspoon (2g) dried parsley or Italian seasoning
Optional Add-Ins (All Alcohol-Free & Pork-Free)
-
1 cup (90g) finely chopped spinach
-
½ cup (75g) diced bell peppers
-
¼ cup (40g) minced red onion
-
1 jalapeño (deseeded and minced) for gentle heat
-
1 teaspoon (2g) smoked paprika or chili flakes
-
Fresh herbs such as basil, cilantro, or chives
Each ingredient adds depth and character, turning a simple comfort food into a more personalized culinary creation.
Step-by-Step Guide: How to Make Cheesy, Crispy Grilled Cheese Roll-Ups
This recipe is wonderfully approachable for cooks of all ages and skill levels. The steps are simple, repeatable, and forgiving, making it a great option for quick meals, family cooking projects, or preparing a large batch of warm, cheesy appetizers for gatherings. Because the process involves familiar ingredients and intuitive techniques, even beginners can follow along confidently while still producing a delightfully crispy, melty result that tastes like something special. Every step contributes to the perfect texture—thinly rolled bread, evenly mixed cheese, and golden, buttery toasting come together to create a snack that feels both nostalgic and playful.
Step 1: Prepare the Bread
Start by laying each slice of sandwich bread on a flat surface. Using a rolling pin, gently roll from the center outward until the bread becomes noticeably thinner and more pliable. This flattening step is crucial because it allows the bread to roll tightly without cracking. The goal is to achieve a soft, flexible sheet rather than a stiff slice, which ensures the roll-ups maintain their shape during cooking.
If you prefer a neater presentation, you may trim the crusts before rolling. This optional step creates smoother, cleaner edges and helps each roll-up toast evenly. Trimming is especially useful when serving these as appetizers or finger foods for guests, as the uniform shape adds an appealing professional touch. Whether trimmed or not, the bread should feel even, thin, and ready to hold the cheesy filling without breaking.
Step 2: Mix the Cheese Filling
In a medium bowl, combine shredded cheddar and shredded mozzarella. These two cheeses melt beautifully together—cheddar offers sharp, rich flavor while mozzarella contributes that irresistible stretchiness. Sprinkle in garlic powder along with dried parsley or Italian seasoning to enhance the aroma and elevate the overall flavor profile.
If you’d like to use optional add-ins such as chopped spinach, diced bell peppers, minced onion, or herbs, fold them gently into the cheese mixture. The key is moderation: while vegetables add wonderful flavor and texture, too many can introduce excess moisture, which prevents the cheese from melting smoothly and may cause the roll-ups to open during cooking. Aim for a balanced mixture—enough add-ins to provide variety and freshness without overwhelming the cheese.
Step 3: Roll the Bread
Place a flattened slice of bread in front of you with the longer edge closest to you. Spoon 2–3 tablespoons of the cheese mixture along that edge, forming a compact horizontal line. Begin rolling the bread forward, keeping the motion tight and even so the filling stays enclosed. Firmness matters here—roll too loosely and the cheese may escape as it melts; roll too tightly and the bread may tear.
Once you reach the end of the slice, press gently along the seam to secure it. Because the bread is soft and thin, it naturally seals itself without the need for toothpicks or extra equipment. Repeat with the remaining slices until all roll-ups are assembled.
Step 4: Butter and Toast
Preheat a nonstick skillet over medium heat. While it warms, lightly brush each roll-up with softened butter. This ensures a beautifully golden, crispy surface while adding rich flavor. Place the roll-ups seam-side down in the hot skillet; this position helps them hold their shape as they begin to toast.
Cook each roll-up for 2–3 minutes per side, rotating them as needed so all sides become evenly browned. The bread should develop a crisp exterior while the cheese inside melts into a smooth, gooey center. Adjust the heat if necessary—too high and they may burn before the cheese melts; too low and they may take too long to crisp.
Step 5: Serve and Enjoy
Once the roll-ups are uniformly golden and crisp, remove them from the skillet and allow them to cool for one to two minutes. This brief rest helps the cheese settle slightly and prevents accidental burns.
Serve them warm with your favorite dipping sauces—classic tomato soup, marinara, ranch dressing, or a simple yogurt-based dip all complement the cheesy richness beautifully. Enjoy immediately while they’re at their meltiest and most flavorful.

Serving Suggestions
Grilled Cheese Roll-Ups shine in a variety of settings. Serve them as:
-
A fun after-school snack
-
A quick lunch paired with hot soup
-
A shareable appetizer at gatherings
-
A late-night comfort bite
-
A creative addition to brunch boards
Their versatile shape makes them excellent for dipping. Try pairing them with tomato basil soup, creamy pesto sauce, or even simple seasoned yogurt.
Four Frequently Asked Questions (FAQ)
(480 words total)
1. Can I use different types of bread for grilled cheese roll-ups?
Absolutely. While soft sandwich bread is ideal because it flattens easily and rolls smoothly, other varieties also work with adjustments. Whole wheat bread provides a slightly nuttier flavor, while brioche offers a sweeter, richer taste. If using artisan or thicker bread, remove crusts and roll thoroughly to prevent cracking. Just ensure the bread is flexible enough to wrap tightly without breaking. Some people also enjoy using gluten-free sandwich bread, which works well as long as it’s gently warmed before flattening to improve pliability.
2. What cheeses melt best in these roll-ups?
The best cheeses for roll-ups are those that melt smoothly and quickly. Cheddar, mozzarella, Monterey Jack, and Colby all work beautifully. Using a blend, like cheddar for flavor and mozzarella for stretch, creates the perfect balance. Avoid aged cheeses that don’t melt easily or crumbly varieties that may fall apart rather than blend into a creamy filling. If you’d like to include a mild tang, a small amount of soft cheese like cream cheese can be added—it enhances richness while supporting the melt without overpowering the flavor.
3. How can I prevent the cheese from leaking out while cooking?
There are several techniques to keep your roll-ups intact. First, roll the bread tightly so the filling is fully enclosed. Pressing down gently helps secure the seam. Cooking seam-side down first also helps “seal” the roll naturally. Using shredded cheese rather than large slices prevents uneven melting that causes gaps. Additionally, don’t overfill—while tempting, too much cheese increases the risk of leakage. A moderate, even layer creates the best melt with the least mess.
4. Can I prepare grilled cheese roll-ups ahead of time?
Yes, these roll-ups are excellent for advance preparation. You can assemble them up to 24 hours ahead, cover tightly, and refrigerate. When ready to cook, simply butter and toast them as usual. They can also be frozen for longer storage. To freeze, place uncooked roll-ups on a baking sheet until firm, then transfer them to an airtight container. When cooking from frozen, toast on slightly lower heat to allow the center to warm without burning the exterior. This makes the recipe especially helpful for busy households, quick lunches, or planned gatherings.
Final Thoughts
(300 words)
Grilled Cheese Roll-Ups offer a delightful combination of simplicity, creativity, and comfort. They remind us that some of the most satisfying dishes don’t require extensive techniques or elaborate ingredients. With just bread, cheese, and a few thoughtful additions, you can create something truly memorable. The roll-up form transforms a classic, familiar sandwich into a fun and modern snack perfect for all ages and occasions.
What makes these roll-ups particularly special is their adaptability. They welcome customization without losing their identity. Whether you choose a mild cheese blend or bold, flavorful additions like herbs or veggies, the base recipe accommodates your preferences. Their manageable size makes them easy to serve at gatherings or enjoy as a personal indulgence.
They also showcase how cooking doesn’t have to be complicated to feel meaningful. There’s something satisfying about rolling, toasting, and watching ingredients transform with just a bit of heat and time. These roll-ups evoke comfort—perfect for cozy evenings, lunch breaks, or moments when you simply want something warm and familiar.
If you’ve been searching for a recipe that’s both nostalgic and new, these Cheesy, Crispy Grilled Cheese Roll-Ups hit the mark. With their golden exterior, gooey melted center, and endless customization options, they’re sure to become a repeat favorite in your home. By making them once, you’ll quickly understand why this simple twist on a classic has become a beloved treat for so many. They’re inviting, versatile, and worth savoring—every crispy, cheesy bite.
Print
Cheesy, Crispy, Perfect—Grilled Cheese Roll-Ups!
- Total Time: 20 minutes
- Yield: 8 roll-ups 1x
Description
Cheesy, Crispy, Perfect—Grilled Cheese Roll-Ups
A fun, easy, customizable twist on classic grilled cheese with optional veggies, herbs, and spices.
Ingredients
-
8 slices sandwich bread
-
1 cup (113g) shredded cheddar cheese
-
1 cup (113g) shredded mozzarella cheese
-
3 tablespoons (42g) softened butter
-
1 teaspoon (2g) garlic powder
-
1 teaspoon (2g) dried parsley or Italian seasoning
-
1 cup (90g) chopped spinach (optional)
-
½ cup (75g) diced bell peppers (optional)
-
¼ cup (40g) minced red onion (optional)
-
1 teaspoon (2g) smoked paprika or chili flakes (optional)
-
Fresh herbs like basil or chives (optional)
Instructions
-
Flatten each slice of bread with a rolling pin until thin.
-
Mix cheddar, mozzarella, garlic powder, dried herbs, and any optional add-ins.
-
Place 2–3 tablespoons of filling along one edge of each bread slice and roll tightly.
-
Brush each roll with butter.
-
Toast in a skillet over medium heat, 2–3 minutes per side, until crisp and golden.
-
Cool briefly and serve warm.
Notes
For best results, don’t overfill the rolls; too much cheese may leak during cooking. To freeze, assemble but do not cook, then store in an airtight container for up to 2 months. Toast on low heat from frozen.
- Prep Time: 10 minutes
- Cook Time: 10 minutes